Conditional rendering
When, for example, you are creating a prototype that has multiple tabs you need to include contents for all the tabs in your code. Each tab will have its own container and proper placement in layout. However, only one tab should be displayed at a time. You also need to allow users to switch between tabs.
With Vue.js, you can specify conditions that must be met for a container to be shown. This is called conditional rendering, and it’s done with the v-if attribute.
Equality
Let’s say you are creating a prototype with three views—Newsfeed, Explore, and Profile—and you want to allow users to switch between tabs with controls on the top right:
Let’s start with creating a layout of this prototype. You need five main containers:
- Top navigation bar with app name and buttons
- Header that shows the title of the current view
- Newsfeed view content
- Explore view content
- Profile view content
The layout will have a nav bar, a header, and three content areas—all visible at the same time:
To display each view only when the corresponding tab is selected, you need to complete three steps:
- Create a variable to store the state of the selected tab.
- Add click event listeners to tab controls to allow the value of the variable to be changed.
- Add the
v-ifattribute to views’ content containers. It will show and hide containers according to the value of the variable.
Let’s go through these steps one by one.
A variable
Make sure the name of the variable suggests that it is used to store the state of the selected tab—this helps you to find it in the layout. Using the string data type allows you to make the variable value meaningful too:
data: {
  currentTab: 'Newsfeed'
}
Event listeners
As explored in the Click article, you can add event listeners to tabs that assign different values to the currentTab variable when clicks are detected:
<div @click="currentTab = 'Newsfeed'">Newsfeed</div>
<div @click="currentTab = 'Explore'">Explore</div>
<div @click="currentTab = 'Profile'">Profile</div>
All three content containers are still displayed, but now you can use currentTab as a title by rendering its value in the header:
<div>{{currentTab}}</div>
Now when you click tabs, you see the header change accordingly:
Conditions
The final step is to use the value of the variable as a condition for rendering content containers. You do this by adding the v-if attribute with conditions to the containers:
<div v-if="currentTab === 'Newsfeed'">
  <!-- Newsfeed content -->
</div>
<div v-if="currentTab === 'Explore'">
  <!-- Explore content -->
</div>
<div v-if="currentTab === 'Profile'">
  <!-- Profile content -->
</div>
The statement for the first container can be read as “show the container only if the value of currentTab equals 'Newsfeed'”. This works in two steps:
===compares the value on the left to the value on the right and returnstrueif they are equal, andfalseif they are not.v-ifrenders the container it’s applied to only if the condition istrue.
Initially, you specified the default value of currentTab as 'Newsfeed'. As a result, the first content container is shown by default: its condition inside v-if is met. Then you added event listeners, that change the value of the variable, so when users click on the Explore tab, for example, the value of currentTab becomes to 'Explore'. When this happens, the first container is hidden because its condition is no longer met, and the second container is shown because its condition is then satisfied:
The Conditional styles article revisits this prototype and explains how you can highlight the selected tab.
Practice
Color palette
Create a simple color palette that allows the user to select a color and see its hex code:
- Create a new prototype from the template.
- Create a variable
selectedColorwith the default value,'red'for example, to store the state of the selected color. - Create colored buttons that change the value of the variable on click.
- Create colored containers with hex values inside. Start with 2 or 3 of them.
- Apply
v-ifto the colored containers so that each of them is rendered only if a particular value is assigned to the variable. For example, the first one should be rendered only whenselectedColoris'red', the second whenselectedColoris whatever name you assigned on click of the second button.
If you have problems with steps 1–4, fork the starting pen. It includes the layout, the variable, and the event listeners. Complete step 5 and try adding more color options to the palette.
Tabs
Recreate the full prototype from this article:
- Fork the starting file.
- To navigate around code faster, collapse main containers using the triangles next to line numbers. Remember to keep them collapsed when you are not working with their contents:
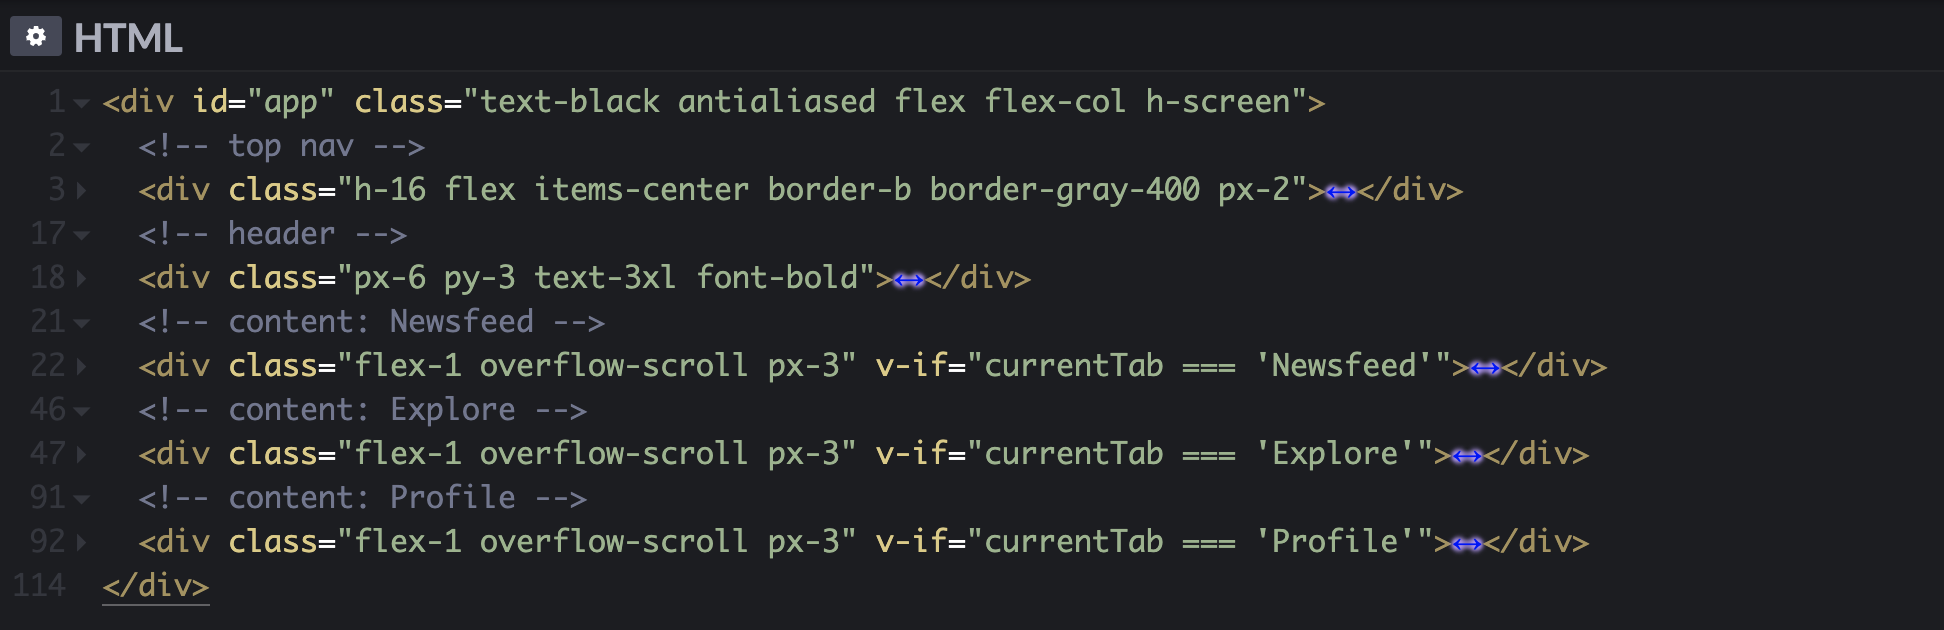
- Follow the steps described in the article: create a variable, add event listeners, and, finally, add conditions to content containers.